Sunday, February 24, 2019

Top 5 Simple Cake Frostings

Top 5 simple frostings you will ever need to know to make many of the different Russian cakes out there, or any cake, all using less than five ingredients. Enjoy!


1. Sour cream frosting
2 cups sour cream (chilled)
2 cups heavy cream (chilled) (substitute: 8 oz of cream cheese)
3/4 cup powdered sugar
1 tsp vanilla extract

Optional: 4 oz (1/2 pkg) of cream cheese

1.    Whisk heavy cream until soft peaks form
2.    Add powdered sugar, sour cream, and vanilla extract. Whisk until firm peaks appear. 
·      Optional: Mix cream cheese ~5min in a separate bowl and fold into mixture. Avoid over mixing, or it might become runny.

Refrigerate if not using immediately. Use within 30min -1hr to avoid deflation. Pairs well with cherries, walnuts, and berries. 


2. Sweetened condensed milk Russian buttercream

1 cup (2 sticks) unsalted butter (room temperature)
14oz (1 can or 2cups+2tbs) sweet condensed milk (room temperature)
1 tsp vanilla extract
Optional: 8oz of cream cheese 

1. Whisk butter 5-7 minutes until it is light and fluffy, approximately 3x its size.  
·      Optional: add cream cheese in with the butter. 
2. Add condensed milk in thirds mixing it minimally, just to incorporate. Avoid over mixing, or it might become runny. 

Refrigerate in a ziplock bag if not using immediately. Use as frosting on cakes or cupcakes. 


3. Dulce de leche Russian buttercream

2 cups (4 sticks, or 16 oz) unsalted butter (room temperature) 
14oz (1 can or 2cups+2tbs) dulce de leche (room temperature) (substitute: 2 cans of condensed milk)
Optional: 2-4 tbs cocoa powder, 2 tbs instant coffee mixed with 2tbs hot water 

1. Whisk butter 5-7 minutes until it is light and fluffy, approximately 3x its size.  
2. Add dulce de leche in thirds mixing minimally, just to incorporate.  Avoid over mixing, or it might become runny.
·      Optional: Combine cocoa powder and/or hot water with instant coffee. Let it cool completely before incorporating it in.  

Refrigerate in a ziplock bag if not using immediately. Use as frosting on cakes or cupcakes. 


4. Chocolate custard buttercream
1 egg yoke
20 g (20ml) of water
120g (4oz) sweet condensed milk
1 cup (2 sticks) of unsalted butter 
2 tsp cocoa powder 

1. In a saucepan mix egg yoke, water, and condensed milk on low heat until it thickens and you can run your finger on the back of the spoon, creating a clear line. Let the crème mixture to cool to room temperature
2. Whisk butter 5-7 minutes until it is light and fluffy, approximately 3x its size.  Add the cooled crème a tablespoon at a time until incorporated. 
3. Add cocoa powder. 

Refrigerate in a ziplock bag if not using immediately. Use as frosting on cakes or cupcakes.


5. Custard/Pastry cream
3 eggs
1 ½ cup sugar
4 cup milk
1 tbs vanilla extract (substitute: 1 tbs lemon juice)
3 tbs flour
Optional: 1 cup (2 sticks) unsalted butter, 1.5 cups heavy cream 


1.    In a saucepan mix (don’t beat) eggs, and sugar on medium-low heat 
2.    Add milk and flour stirring occasionally until it thickens, like pudding (~15min), and you can run your finger on the back of the spoon, creating a clear line.
·      Optional: Mix in heavy cream in the saucepan as well.
3.    Let it cool to room temperature (~20min). Add vanilla extract.
·      Optional: once cool, add softened butter, and whisk on med-high speed for a few minutes. 

Refrigerate if not using immediately. Use as frosting on cakes, éclairs, or even fruit salads. In Russian, this frosting is also called, заварной крем. 


What is your favorite frosting?


Photo Source: handletheheat.com
#food #occasionalindulgences #toprussiancakes #russiancakes #holidaybaking #cakingbakinginspiration #cakefrosting #cupcakefrosting #toprussianfrostings #Healthystrongbeautiful  #HSBvibes #HSB#thrive #optimism #lifeperspective #awareness #healthpromotion #diseaseprevention #wholistichealth #healthyliving #nurseselfcare #mentalhealth #physicalhealth #spiritualhealth #Healthandfitness #healthcoach #wellnesscoach #lifestylecoach #healthandwellness #selfcare #takingcareofyourself

Saturday, February 23, 2019

Top 20 Russian cakes

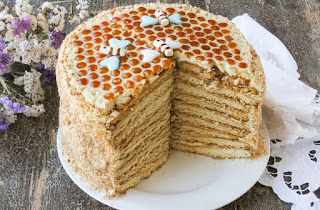
During celebrations, we sometimes need some baking inspiration. Here I have listed the top 20 Russian cakes organized by the frosting used, for the occasional indulgence. If you can nail down a good recipe for the frostings, you can essentially make many of these cakes with a few tweaks here and there. Enjoy!

Sour cream frosting
·      Honey cake “Медовик”
a.   Saffron cap mushroom cake “рыжик”- Like the honey cake 
b.   Spartak cake “Спартак” -- Like the honey cake, but with chocolate layers. Also, it can be made with sweetened condensed milk buttercream, or custard cream.

·     Smetannik cake “Сметанник”
a.     Day and Night cake “День и Ночь” -- Like the smetannik cake. Also, it can be made with sweetened condensed milk buttercream, or custard cream.
b.    Zebra cake “Зебра”-- Like the smetannik cake.  Also, it can be made with sweetened condensed milk buttercream, or chocolate genache.

·     Marble cake “Пинчер” 
a.    Pancho cake “Панчо” -- Like the Marble cake. 
·     Prune cake “чернослив”

Dulce de leche Russian buttercream
·     Markiza cake “Маркиза/Торт-безе ”
a.    Holiday cake “Празднечный” -- Like markiza cake, but made quicker.
·     Russian Royal cake “Королевский”
·     St Petersburg “ленинградский”
·     Squirrel “белочка”

·     Honeycomb cake-  Also, it can be made with sour cream frosting.

Sweetened condensed milk Russian buttercream
·    Kiev cake “Киевский” 

Chocolate custard buttercream
·      Prague cake “Пражский” 

Custard cream
·     Napoleon cake “наполеон” --Also, it can be made with Dulce de leche buttercream
·     Fairy tale “скаска” 
·     Flight “полет”


What's your favorite Russian cake?


Photo source: niftyrecipie.com
#food #occasionalindulgences#toprussiancakes #russiancakes #holidaybaking #cakingbakinginspirationn #Healthystrongbeautiful  #HSBvibes #HSB#thrive #optimism #lifeperspective #awareness #healthpromotion #diseaseprevention #wholistichealth #healthyliving #nurseselfcare #mentalhealth #physicalhealth #spiritualhealth #Healthandfitness #healthcoach #wellnesscoach #lifestylecoach #healthandwellness #selfcare #takingcareofyourself


10 Steps To Understanding Makeup Products.

We all have our days when we just look way too tired, and need some help freshening up with some make up. Yet, with all the makeup products out there, we don't always know where to start. With your face washed and patted dry, follow this list for a quick rundown of makeup products to aid in your experimentation journey in discovering your signature look.  

1.    Skincare
o  Light Facial moisturizer: Apply this under your eyes, over your eyelids and entire face to help prime your skin, so that you hydrate your skin, as well as, help your makeup set and last longer (~8hrs).

    Optional--Hydrating face tonic: To soften skin and prep it for moisturizing

2.    Foundation
o  Liquid Foundation: Apply to help create an even complexion. It's very important you match your foundation to your skin color, otherwise it can be a total deal breaker and make things look off. 
     
      Tip--If you have good skin, you don't need to add foundation, you can use a tinted moisturizer/concealer instead. (A tinted moisturizer can be made by mixing your facial moisturizer with some of your liquid foundation, or concealer.)

3.    Concealer
o  Concealer: Helps cover dark areas under your eyes, redness around your nose, and other blemishes. In addition, highlights/contours places on the face you want to stand out by applying it in the middle of your forehead, bridge of your nose, and chin. Choose a color that is one shade lighter than your natural skin color. 

  Optional--Corrector: Apply before concealer if you have more serious skin conditions like acne scars, melasma, or rosacea etc..

 Optional-- Compact  Mineral Setting powder: Use after liquid foundation and concealer has been applied to help remove excess oil/shine and prevent foundation from rubbing off. Also, can be used as a bronzer or foundation as well. Moreover, can be a tool to help touch up your makeup throughout the day. Important to add if you're going to have a photo shoot. 

4.    Bronzer
o  Matte brown Bronzer: To contour and emulate a sun-kissed glow, apply it in the shape of the number 3 along your hairline near your forehead, cheekbone and jawline via a medium sized bronzer brush. 

      Tip: Instead of a bronzer, you can always use a setting powder 2 shades darker than your skin tone. Don't forget to apply some to the neck as well. 

5.    Blush
o  sheer Blush: Apply to apples of cheeks, then blend and fade it back towards your temples to warm up your complexion and appear more radiant.  Choose a color 1-2 shades darker or lighter than your natural blush color.

     Tip: Add crème blush to crème foundation, and powder blush to powder foundation. Remember to not add blush too close to your eyes, leave an index finger width of room in between. 

6.    Lips
o  Lip balm: This helps hydrate and smooth your lips before applying lipstick. 
o  Lipstick: Express your individuality and apply to lips via a lip brush for precision. Choose a color 1-2 shades darker or lighter than your natural lip color.
      
     Tip: To help lipstick last longer, you can add lip stain first. To help create plump lips, fill the middle section with a light concealer, then blend it with finger and add nude lip gloss. To help define lips and prevent lipstick color from bleeding out, line your lips with a fine tip concealer brush.

  Optional--Lip liner pencil: Choose a matte color that is two colors darker than your natural lip color.  

7.    Brows
o  Brow powder: To help frame your eyes and make it look more open, first shape your brows. Then add medium brown brow powder to just the areas that are sparse. Blend it in with a brow brush. Choose a color that matches your natural brow color.

     Tips-- To help define your brows, apply concealer directly above and below your brows.

8.    Eye shadow
o  Eye shadow: 
      1) Eye base color--To brighten the eyes choose a light neutral eye shadow color to cover from lash line to brow.
      2) Eyelid color-- To add some warmth choose a light/medium eye shadow color to cover from lash line to eye crease.
      3) Accent color--To add depth and definition add a darker eye shadow color in a "V" shape from your outer lash line to eye crease. Then, blend all the hard edges with a lighter eye shadow. For a smokey eye look you can substitute the accent color with a bronzer

     Tip: To brighten the eye, add very little white eye shadow on tear duct and bridge of nose. Another option is to add concealer in a "V" shape from your outter lash line to eye crease, middle of eyelid, and just below your brow bone. 

9.    Eyeliner/Macara
o  Gel Eyeliner: To make your lashes look lush, apply to top lash line starting from the outer corner to the inner corner. 
o  Black Mascara: You can get an eyelash primer to lengthen and thicken lashes before adding mascara

10.  Other handy products
o  Wet wipes.
o  Visine: helps with bloodshot eyes, making them look bright and clear
o  Oil based makeup remover to remove waterproof products like mascara or gel liners. 
o  Eye lashes #110 & #21: Place a very small amount of glue on end of lashes and start placing the longer lashes at the outer corners, as you work your way towards the middle with the the shorter lashes. Help press the lash down with the end of a bobby pin. There should be a minimum of 3 individual lashes per eye. 


What makeup products do you love to use for your signature look?


#howtostartusingmakeup #makeupproducts #beginnermakupuser #puttogether #makeup101 #makeupfundamentals #outerbeauty #makeupessentials #Healthystrongbeautiful  #HSBvibes #HSB#thrive #optimism #lifeperspective #awareness #healthpromotion #diseaseprevention #wholistichealth #healthyliving #nurseselfcare #mentalhealth #physicalhealth #spiritualhealth #Healthandfitness #healthcoach #wellnesscoach #lifestylecoach #healthandwellness #selfcare #takingcareofyourself

Saturday, February 16, 2019

Kitchen: Food Inventory List

Do you need help making cooking at home easier for you? Do you want to start cooking more, but don't know where to start? How about help finding inspiration for meal preps, help with grocery shopping, or just reducing food waste? If so, first step, you need to know what you have in your kitchen! That includes your pantry, cupboards, refrigerator, and freezer. Take these 3 steps to start your kitchen personalizing journey:

1) Take everything out of your cupboards and group them. Discard old spices, and place the good ones back into the cupboard by their category.  Have a designated spot for similar categories. (Repeat this process with your pantry, refrigerator, and freezer)
                           
2) Write down a list of all of the food that you have under categories similar to the following to help keep an inventory of household food:
  • Rice & Grains: Beans, rice, pasta, rolled oats, quinoa
  • Dried herbs: Bay leaves, salt/pepper, paprika, steak seasoning, cayenne pepper etc. 
  • Oils/Vinegar/Condiments: Extra virgin olive oil, white wine vinegar
    • Fridge: Ketchup, mayonnaise, ranch, soy sauce, barbecue sauce
  • Canned goods: Broth stock/soup base, tomatoes (paste, sauce), olives, kidney beans
    • Homemade canning: whole tomatoes, pickles, fermented cabbage
  • Snacks/cereals: Dried fruit, crackers, nuts, seeds, tortilla
  • Drinks: Coffee, Tea, apple cider, mineral water, orange juice
  • Baking: Baking soda/powder, vanilla extract, flour, cornstarch, yeast, gelatin
  • Fresh produce: Tomatoes, cucumbers, carrots, celery, lettuce, avocado, onion, garlic, potatoes
    • Fruit: Bananas, apples, oranges
  • Dairy: Milk, eggs, sour cream, cream cheese, yogurt, butter, feta cheese
  • Freezer: Chicken breasts, ground beef, vegetable mix, fruit mix,  puff pastry, pizza dough

3) Lastly, look at your list, and make note of what you need to buy, or possibly have a lot of and can use as an inspiration for your next recipe.Your now well on your way to achieving your goals in the kitchen! Well done.


What type of food did you find you had more than expected?


***Picture source: BuzzFeed
#pantryorganizing #kitchenorganizing #beginnercook #overwhelmed #kitcheninspiration #mealinspiration #foodinventorylist #Healthystrongbeautiful  #HSBvibes #HSB#thrive #optimism #lifeperspective #awareness #healthpromotion #diseaseprevention #wholistichealth #healthyliving #nurseselfcare #mentalhealth #physicalhealth #spiritualhealth #Healthandfitness #healthcoach #wellnesscoach #lifestylecoach #healthandwellness #selfcare #takingcareofyourself

50 Daily Spiritual Affirmations for kids (+ Adults too!)

    The thoughts we think and the words we speak matter.    Spiritual affirmations are statements of God’s biblical truths/promises/blessing...